|
PREPARE FOR WINTER STORAGE:
- Top off the fuel tank
- Top off windshield washer fluid with winterized blend
- Prop refrigerator doors open, turn the fridge thermostat to 0 (zero), and use one of the expanding "keep" rods to shut off the light
- If the RV will not remain plugged into power, disconnect the house batteries and hook up trickle charger to chassis battery
- Remove all bottled liquids and canned foods from RV
- Disconnect the water
- Open the primary fresh water tank drain valve inside the water bay
- Open the two plumbing drain valves (hot and cold) inside the water bay
- Wait for all water to stop dripping from underneath RV
- Close the primary fresh water tank drain valve inside the water bay
- Turn ON water pump until no water comes out of two plumbing drain valves
- Turn OFF water pump
- Close the two plumbing drain valves
- TANK HOT WATER HEATERS: Drain the hot water tank - open the outside door, open the pressure relief valve, and remove the small white plug - STAND BACK! Hot water will flow!
- Turn OFF all faucets and shower
- Replace the hot water tank drain plug and close the pressure relief valve
- Hook up compressor to your main water line using this attachment, set the compressor pressure to 50 PSI or less, and turn on compressor
- Open the kitchen sink HOT water and run until only air comes out. Close
- Open the kitchen sink COLD water and run until only air comes out. Close
- Do the same HOT then COLD in the bathroom sink
- Flush toilet until only air comes out
- Run toilet sprayer until only air comes out
- Open the shower HOT water and run until only air comes out. Close
- Open the shower COLD water and run until only air comes out. Close
- Open the outside shower HOT water and run until only air comes out. Close
- Open the outside shower COLD water and run until only air comes out. Close
- Open the primary fresh water tank drain valve inside the water bay and switch the water fill lever to "tank fill" for about 10 seconds. Close and switch lever back.
- Open the HOT plumbing drain valve inside water bay until air comes out. Close
- Open the COLD plumbing drain valve inside water bay until air comes out. Close
- Repeat the above steps for kitchen sink, bathroom sink, toilet, shower, and outside shower until only air comes out
- Turn off the compressor and disconnect the flush attachment from the fill hose and, if you have a permanently mounted fill hose, cap the fill hose
- Add about two cups each of RV anti-freeze (the pink stuff) (Walmart also carries seasonally) to the kitchen sink drains (2), bathroom sink drain, and shower drain. Add about 4 cups to the toilet and flush, then add 2 cups and leave in toilet bowl.
|
|
How much or little of this you do really depends on how cold for how long.
Protect the fresh water coming into the RV - get a Heated Hose with Thermostat. Fill your fresh water tank, use the pump, and leave the external water supply closed unless filling.
Protect your fresh water storage - using one of these reptile heat lamps (Heating Lamp Stand, Heating Lamp Bulb and Auto On-Off Thermostat) and put it in your water bay.
Protect your holding tanks - Add a small amount of RV Anti-Freeze to your drains so the holding tanks valves do not freeze. Most of the time, your tanks will be fine with just the heat from the RV. Keep your waste tank valves CLOSED until you need to dump and only dump when full, then re-add a bit of anti-freeze.
Keep your living space as efficiently warm as possible:
- Install vent cover(s)
- Install roof AC cover(s)
- Cover windows with Reflectix and use heavy curtains
- Seal any drafts in the doors
- Insulate the "garage" bays and floor with foam board and Reflectix
- Help insulate the floor of the RV with some heavy throw rugs
- If the park allows it, install RV skirting. The wind blowing under your RV can freeze the water tanks and will suck heat out of the RV
- Service the propane heater
- Use a couple of these portable electric heaters to reduce the cost of propane
- Finally, make sure you have some warm sweaters and blanket - just reducing the thermostat by a few degrees can make a big difference in propane use!
|

|
The MCD front shade is great for both privacy and as a sun visor when driving.
The “sun visor” position should be just above eye-level while sitting as you would be while driving.
The “privacy” position should be all the way down to the bottom of the inside of the windshield plus a little “slack”.
The “full up” position should be about 1 inch from the roller.
You will need to locate two buttons:
- The Learning button. This should be at the end of a short wire on the left side of the shade.
- The UP/DOWN button. This should be in the center console of the dash (below radio)
ADJUSTING THE FRONT MCD SHADE:
- Using the UP/DOWN button, put shade it the up-most position.
- Turn ignition key ON (engine can be running or not).
- Press and hold Learning button while pressing the DOWN button.
- Release Learning button when you hear a beep - keep holding the DOWN button.
- Keep holding the DOWN button until the shade is close to the desired “sun visor” position.
- Nudge the DOWN button (ONLY NUDGE - do not press and hold!) until the shade is in the precise “sun visor” position.
- Press and hold the UP button until the shade is just below desired “full up” position.
- Nudge the UP button (ONLY NUDGE - do not press and hold!) until the shade is in the precise “full up” position.
- Press DOWN button until you hear a beep to lock in the ENGINE ON positions.
- Turn ignition key OFF.
- Press and hold Learning button while pressing the DOWN button.
- Release Learning button when you hear a beep - keep holding the DOWN button.
- Keep holding the DOWN button until the shade is close to the desired “privacy” position.
- Nudge the DOWN button (ONLY NUDGE - do not press and hold!) until the shade is in the precise “privacy” position.
- Press and hold the UP button until the shade is just below desired “full up” position.
- Nudge the UP button (ONLY NUDGE - do not press and hold!) until the shade is in the precise “full up” position.
- Press DOWN button until you hear a beep to lock in the ENGINE OFF positions.
- Press UP button until the shade is in the “full up” position.
- Test all 4 limits and you are done!
|

|
Water tank and system disinfecting
I usually do this about once per year or after the RV has been sitting for a long time unused.
Use regular Clorox liquid bleach - nothing with added scent, etc.
- Remove any water filter cartridges from their canisters (under the sink, etc) and install the bypass plug (or if yours does not have this, close them back up without the cartridge)
- 1/2 cup per 30 gal of water - more is NOT better and can harm the plumbing. Fill the fresh water tank about 1/2 way, poor in 1/2 cup bleach, fill the rest of the water tank to full
- Drive around for about 5 minutes to mix it up
- Turn the pump on and run water from each faucet, the shower, and the toilet until you can smell bleach from each
- Let sit for 24 hours
- Turn the pump on and run water from each faucet, the shower, and the toilet until water tank is empty
- Fill water tank completely with fresh water and run each faucet, the shower, and the toilet for a few minutes each until the water tank is empty and/or both grey and black tanks are full
- Fill water tank completely with fresh water
- Let grey and black tanks sit for 24 hours
- Dump black and grey tanks
- Dump water tank
- Fill water tank completely again with fresh water
- Turn pump on and run water from each faucet, the shower, and the toilet for at least a minute each
- Replace any water filter cartridges removed from the first step. This is an excellent time to replace the filter. This is the water filter I use which is about one third the cost of the OEM one
- Add 1 cup of Borax 20 Mule Team and 1 cup of Dawn Dishwashing Liquid to the toilet bowl and mix, then flush. This will keep the tank sides and sensors clean from "gunk".
- Use plumbers grease on toilet ring
- Done. You now have sanitized tanks and water system
|
|
Whenever, Dry Wash
If you do the annual full-wash, polish, and protect, you can do this whenever you need to clean and bring the shine back! This is really nice when staying at a park that does not allow water washing. Simply use the Aircraft/RV Wash with the wet/dry applicator. Spray the wet side of the applicator with wash and wipe off the grime, then use the dry side to bring the shine back! Work in 3 foot sections at a time.
See the Wash Purchases area for full product descriptions/links
|

|
Annual Full-Wash, Polish, and Protect
I do this yearly or whenever the "Whenever, Dry Wash" does not bring back the desired shine. This whole process usually takes me an entire day and should be done in cooler weather, so plan ahead. Make sure you have a lot of microfiber towels on hand!
Start by using a pressure washer with a foam cannon with Auto Wash in it. This makes the wash go very fast! Use the medium scrub brush on the roof first and rinse the roof completely. Then move to the rest of the RV using the soft scrub brush on an extendable pole, then rinse.
Next, polish. You will want to get this light weight polisher it is worth every cent! This is the most time consuming step. Use a good quality Polishing Glaze.If you have scratches, use a more abrasive polish like Diamond Cut Compound or Oxidation Remover Compound on those sections first, then come back with the regular polish. It is very important to work in small, 3 foot square sections because you do not want to let it dry before wiping off! (see Wash Purchases for polisher, polish, etc).
Once polishing is complete, it is time to apply the high-gloss protection. This is done INSTEAD OF wax. With this you apply in TWO VERY THIN coats - this will give almost 100% UV protection on the finish and help to avoid oxidation (for removing oxidation, use an oxidation remover before polish). I apply with a separate polishing pad and work on half the RV at a time - apply to half, then go back and remove with the Microfiber Towels to finish the shine!
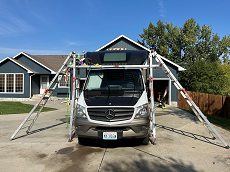
To reach the roof and, especially, the front, I use two Little Giant Ladders with an Extendable Plank between them. I purchased these when I painted my house, so the cost was competey worth it. Not sure it would be worth it just for washing (but, this setup is ideal for it!)
See the Wash Purchases area for full product descriptions and links.
|


